
4/28/2009 FTPing to a Web Server
PCI/PCI-E/AGP Installation
RAM Installation Removing Programs from Startup
Disk Cleanup and Defragmentation 1/5/2008 |
Editing a Website This tutorial will go over the basics of editing a website, this tutorial should be supplemented with the FTPing to a Web Server found to the left. Once you have completed an edit on a website you will need to FTP to the web server to make the changes viewable to the public. Download a web editing program The Computer Cure uses dreamweaver to create our websites, but there are also many free web editors that offer some of the same basic features. One of these programs is called KompoZer which is based off of Nvu's website editor. Click to download KompoZer. Once you have downloaded the file, unzip it by double clicking and then drag the entire KompoZer folder to somewhere on your computer, desktop, documents, program files, it won't matter where you choose.
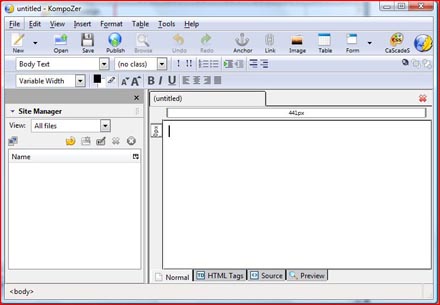
Once you have chosen a place to put the folder, go ahead and open it and double click on "kompoZer.exe". You will see a screen similar to the one below:
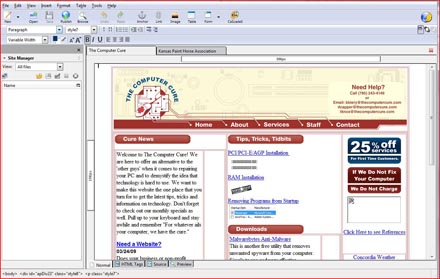
If you have an existing website go to File>Open File, locate your website folder and open any one of the HTML files that you wish to edit.
As you can see the site is pulled up and appears just as you would see it on the web with the exception of some layout borders. At this point the program is much like a word processor and many of the controls will be easy and familiar to use.
The main controls that you will be wanting to use will be the text controls which include bold, italics, underline and different justifications. As was stated these work almost identically to the controls in a word processing application so you should be familiar with them already.
If you wish to create a hyperlink on your website you can use the link button:
When the link button is clicked it will ask you what you want the text to display and also where you want it to link to. If you already have the words highlighted that you want to be a hyperlink it will automatically input those into the first box for you. The image button is another one that will be used frequently when you want to add pictures to your website.
When you click the image button you will be prompted to locate the file you want to add, this is done by clicking the small folder on the right side of the text box.
Once you have located the file you will be able to hit "OK" and the image will be added to your website. Be sure to have the cursor at the location you want the image before trying to add it or you may have unexpected results. It is also good practice to make sure that the image is sized correctly to fit before you add it to the web site. There are many other options that can be used, but these are the very basics of editing your website. With these tools you should be able to add/delete text, add hyperlinks to your website, and also add pictures. Keep in mind that until the website is uploaded via FTP there will be no changes to your website, so do not be afraid to try new and different options out along the way. When you have completed the editing stage you will want to follow the tutorial on FTPing to the Web Server in order to get your newly edited files to your domain so everyone can see them.
|
|


![]()